Apr 3, 2025
In enterprise environments, Oracle Fusion Applications are often extended to meet specific business requirements. But once these extensions are built, how do we move them from a development or test environment to production?
That’s where Oracle Visual Builder Studio (VBS) shines. With built-in CI/CD features, VBS makes it easy to version, manage, and deploy extensions across instances in a controlled and traceable manner.
This guide walks you through deploying extensions from a source Oracle Fusion SaaS instance to a target instance using VBS.
Step 1: Login to VBS from the Source Instance
Log in to Visual Builder Studio directly from your source Oracle SaaS instance (typically your dev or test environment). This is where you’ll initiate the deployment project.

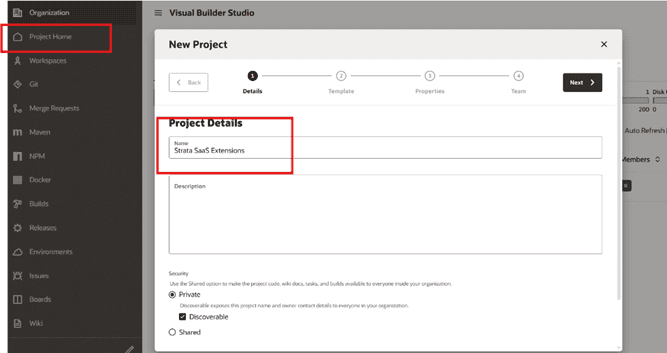
Step 2: Create a New Project
Navigate to the Organization tab and create a new VBS project. This project will act as a container for managing your deployment artifacts, builds, and pipelines.
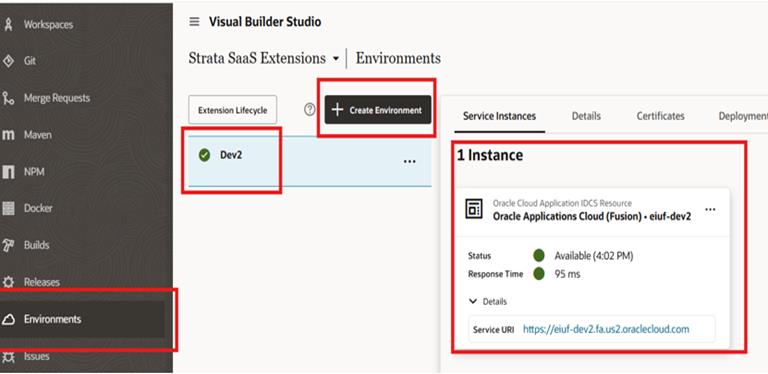
Step 3: Add the Target Environment
Navigate to the Environments tab and click Create Environment. Add your target Oracle SaaS instance details:
Instance Type: Oracle Cloud Applications using Application Credentials
Instance URL: Full URL of the target instance (e.g., https://<instance>.oraclecloud.com)
Username & Password: Provide valid credentials with deploy privileges
Step 4: Clone Workspace from Git
Head over to Workspace → Click Clone from Git.
Use the following details:
Workspace Name: your-workspace-name
Repository Name: your-git-repo
Branch: main
Development Environment: Choose the Target Environment
Click Create.

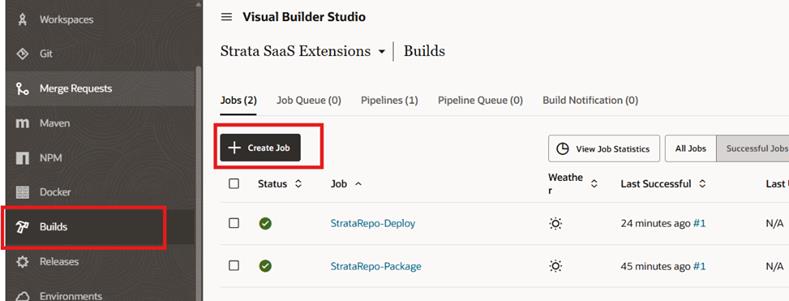
Step 5: Create a Deployment Job
Navigate to the Builds section.
Click on Create Deployment Job.
You can create a new job or duplicate an existing one if available.
Once the deploy job is created:
Select it and click Configure.
In the configuration steps, select the target environment you created earlier.
Save your changes.
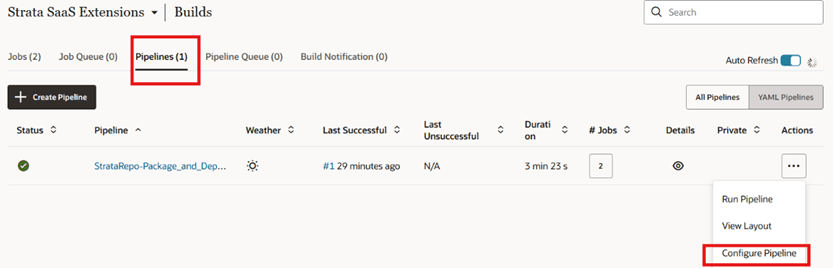
Step 6: Set Up a CI/CD Pipeline
Now let’s automate it.
Go to the Pipeline tab.
Click Configure Pipeline.
Add your Deployment Job to the flow.
This ensures deployment gets triggered after code changes are published.
Step 7: Make Changes and Publish
Enter the workspace.
Make any required changes to your extension.
Click Publish.
Confirm the target environment and enter a meaningful commit message.
Your deployment job will now be submitted.

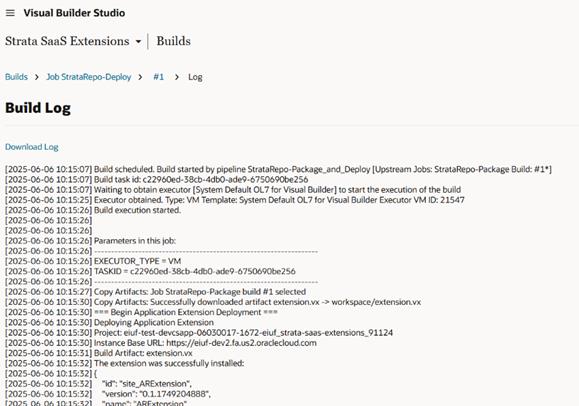
Step 8: Monitor the Build Process
Return to the Builds section.
Monitor the status of the deployment job.
Review the build logs if needed to troubleshoot any issues.
Once the build is complete, the extension should be successfully deployed to the target instance.
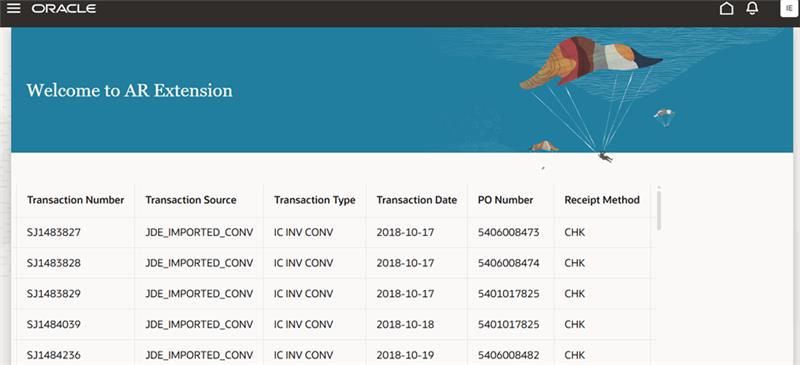
Step 9: Verify Deployment
Go to:
Environment → Manage Extension Lifecycle
Here, you can verify that the extension has been successfully deployed to the target Oracle SaaS environment.
Final Thoughts
Oracle Visual Builder Studio offers a robust and scalable mechanism for managing the lifecycle of SaaS application extensions. By configuring environments, builds, and pipelines, you can ensure smooth, consistent, and auditable deployments across your Oracle Fusion instances.
Visual Builder Studio provides a powerful and intuitive CI/CD flow tailored for Oracle SaaS extensions. With just a few clicks and configurations, you can automate and audit your deployments across multiple environments.
This process not only enhances deployment consistency but also reduces manual effort and the chance of errors—perfect for agile Oracle implementations.